Showing posts with label DIY. Show all posts

Thursday, June 13, 2013

Pinterest Organizational Project: FAIL

So, if you know me, you know that I FINALLY got into Pinterest. It's seriously addictive. It was the "funny" board on my mom's page that got me hooked. Now I spend every free minute "pinning" recipes, home decor ideas, DIY projects, fashion ideas- you name it, it's on Pinterest. So, the other day I was thinking about how many clever organizational projects I've seen on Pinterest. Clever and super inexpensive ways to re-organize your life. I decided to try one.

I have a LOT of scarves. I wear them all the time- almost year round. They're a fun fashion statement. My current scarf storage method involves hanging them on a plastic coat hanger on the inside of my closet door. Like this:

Kind of messy, but not horrible. Well, while browsing Pinterest, I saw a whole bunch of DIY scarf holder projects that were modeled after this one from Ikea: 


Most projects involved making circles out of wire coat hangers and taping them together. Seemed pretty simple, right? I thought that I was even more brilliant when I decided not to waste an hour of my life cutting coat hangers and fashioning the pieces into circles. Instead, I decided I should just use a $1.38 package of shower curtain rings. 


You can see I've already bent the coat hanger into shape. I liked the multiple "U" shapes that allowed for hanging belts or small scarves on the hanger itself. And here's the finished product: 


The entire project took about ten minutes to complete. That should have been a red flag. I proudly marched upstairs and started pulling the scarves through the loops. I hung my new scarf hanger in place of my old one and literally before I had a chance to snap a photo, the entire thing fell apart and all my scarves were in a pile on the floor. Fail. 

So, here's how my scarves are currently organized in my closet: 


They're slightly neater and more organized than before the project began, but the single coat hanger method is going to have to work for me for now. After all, the closest Ikea is over an hour away. I'm not driving that far for a scarf organizer anytime soon. 

So, the lesson here is to remember that DIY projects on Pinterest aren't always as they seem. But at least in this case, nothing was damaged and we can all have a good laugh at what a fool I can be. 

Have a great day and as always, thanks for reading! 


Tuesday, May 28, 2013

How to Host a Spa Slumber Party

When the Professor's daughter asked if I would host a spa slumber party for her 8th birthday party, I was happy to oblige. I have a tendency to over-plan, over-spend and generally over-do things like this, but this time I decided I was going to exercise restraint and try to make it fabulous on the cheap.

In searching through Pinterest, I was surprised at how few parties like this were pinned. Most of what I found online was geared towards hiring someone who brings everything in for you and costs upwards of $500-$600 for the party OR the most basic info like how to create a label template for making your own bubble bath or something.

In the end, I just decided to do it all myself and I'm very pleased with how it turned out. Originally, we planned on have four girls including the birthday girl. We wanted it to be manageable and modest. I figured with such a small number of girls, I could really go all-out and still not spend a fortune. And I succeeded!

To start, I knew each girl needed a spa robe, so with my 40% off coupon, I headed off to Joann Fabrics. Unfortunately, there wasn't any terry-cloth, but I made do with some bright pink fleece. I made these simple robes using a one-cut method. In other words, I cut the entire robe in one piece and then simply sewed up the sideseams to finish it off. I got a little fancy by adding the loops on the side for the waist ties, but other than that, I kept it very simple. In total, these robes cost $35.97 in fabric and an hour of my time. Literally- it took one hour to cut and sew all four of them- that's how simple they are.


Once the robes were completed, I was able to focus on creating their spa bags. The way I saw it, each girl needed a spa bag of items that she would use at the party that was separate from her spa goodie bag, which was her take-home party favor. 

The spa bag included a robe, a pair of flip flops, a sleep mask, a stretchy headband and a small towel. Believe it or not, everything I needed, I found at the DOLLAR STORE!!! And the best part was that everything except the towel was the same shade of bubble gum pink that I used to make the robes!


As each girl arrived, she was given her spa bag (that had her name written on it). We started with mani/pedis, but before their nails were painted, they were given some creativity with decorating their flip flops. Ribbons, glittery stick-ons, and more ribbons were in abundance. The girls' creativity came out in spades and they each ended up with some seriously fabulous flip flops:


After mani/pedi time, we took a break to eat dinner and have cup cakes. Not long after that, it was time to change into swimsuits and spa robes. They used their pink headbands to hold back their hair so I could smear a strawberry-scented mud mask (that I brought from home) on their faces. Cucumbers covered their eyes for the few, brief moments of "relaxing." Finally, they all hopped into the Professor's jacuzzi tub complete with bubble bath and, of course, a chance to wash the mud off their faces. They loved every minute of it and I think they all felt very pampered. It was fun for me to plan as well. 

I mentioned their spa party favor goodie bags, so I have to show those as well, or at least what went into them: 


What's pictured above isn't a complete photo, but you get the idea. The flip flops, sleep masks and head towels (at the bottom of the photo) all went into their spa bags. The rest was in their party favor goodie bag and it included: 

A manicure set
A pink glitter nail file
A bottle of pink glitter nail polish
A bottle of scented hand lotion
A tube of cherry lip gloss
A pink hair clip
A pink loofah
A mini-bottle of nail polish remover

Most of what I purchased came from the Dollar Tree, but a few things were purchased at Sally Beauty Supply from the clearance section. I also threw some candy and glow-in-the-dark rings and bracelets in there as well, but I didn't take a picture of them. Grand total for all the bags and their contents was about $48, so that combined with the cost of making the robes came to a total of $83.97 or around $21 for each girl. Not too shabby, if you ask me! I think I got a lot of bang for my buck since each girl went home with a boatload of goodies including her own spa robe!

I know that as the Professor's daughter gets older, there will be even more spa-parties and hopefully actual trips to the spa in our future! And fortunately I know how to make spa robes on the cheap! 

Have a great day, everyone and thanks for reading! 

Saturday, June 11, 2011

Rate My Look- Saturday Black

Even though there are many Saturdays when I just don the first black dress I come across in my early morning closet perusal, there are still plenty when I try to make my all-black look a really stellar one. A few weeks ago, we had a trunk show and for some reason, with wedding gown designers around, I just felt the need to try a little harder. So, I pulled out my enormous flower and pinned it onto the black dress that I recently made for myself:


What an easy way to take a simple dress and turn it into a spectacular (and BOLD) statement! And the best part is that the flower was less than $10 at Forever 21, proof that you don't need lots of money to look fabulous. 

What do you think of my Saturday all-black outfit? Exciting? Over-the-top? Boring? Whatever you think, I'd like to know!

Saturday, January 15, 2011

The Case of the Lop-sided, poorly constructed, barely functional handbag OR Why patterns are a good thing

I had big plans for a post in which I dazzled all of my faithful readers with my uncanny sewing and design abilities. I began by purchasing some beautiful Fossil-inspired fabric with which I planned to create a fabulous spring/summer handbag.

I'd seen some really fabulous bags by Fossil at various stores and I fell in love with the brightly patterned material. I did not fall in love, however, with the plastic-like finish on top of the fun brightly colored fabrics. The wheels in my head started turning and before I knew it, I was purchasing $17.54 worth of fabric and notions for my hare-brained scheme. I picked out a super fun outdoor canvas in a bold floral print for the exterior as well as a bright yellow cotton/poly blend for the lining. I knew I wanted a basic half-moon shape purse with interior pockets for things like keys and a cell phone. I never once bothered to look for a pattern that was even remotely similar to what I was picturing in my head. I just forged ahead, with visions of new handbags all over my Etsy shop. This would be my gateway bag- the one that led to fame and fortune all because of some simple sewing. I created a pattern of my own because I figured making bags can't be that difficult, so why bother with buying a pattern. I did a little playing around and then boldly cut into both of my fabrics:


The extremely short amount of time I spent "figuring out" the various pieces should have clued me in, but my hubris was running amok at this point. I did spend about 5 minutes on a muslin pattern piece for the body of the bag- I wanted the exterior to have a little pleat in it for a little more visual interest, but obviously the interior lining needed to be flat.

Despite never having attempted anything like this, I didn't do a single bit of research or  bother to sew a couple of muslin pieces together beforehand to work out the kinks. Nope. Why mess around practicing when in my head, it's all figured out? After all, it's just a purse! How hard could it really be? And if you're wondering at this point if I bothered with interfacing, then you clearly aren't getting the gist of this post.

Next, I made the pockets and actually congratulated myself on remembering to sew them into the lining BEFORE sewing the lining together and installing it in the bag:

I was so proud of my perfect creases and neat stitches. Finally, I worked on the exterior, pressing the pleats in place and then sewing the pattern pieces together. Next, I installed the lining and finally, I attached the handle. Aside from a little top-stitching and a closure, I was just about finished. 

At one point, I even paused to take pictures of the shoulder strap with the intent to wax poetic on the many virtues of owning a loop turner. What was I thinking? There's not much that's LESS exciting than turning THIS:


Into THIS: 

What? No picture of the shoulder strap AFTER I turned it right-side-out with the loop turner? One might think it was because I had started to see the imperfections in my craftsmanship and was starting to feel a little less confident showing it to the whole world via an internet blog post. You'd be wrong. I was actually starting to salivate because I could literally taste the end of this project drawing near. 


After adding the last of the top-stitching, I held my finished bag up in front of myself to admire my handiwork only to realize it was a lop-sided, poorly constructed, barely functional excuse for a handbag and under no circumstances could I ever list it in my Etsy shop. Over an hour of my life went into this bag and my best hope for it is that my mom will occasionally carry her lunch to work in it without the contents spilling out all over the place. 


At least my pleats look good (on THIS side, anyway). I think from now on, I'll stick to what I know: dresses. 

Friday, October 22, 2010

Getting Thrifted Clothes Clean

I spent the morning at Salvation Army with my mom- we LOVE bargain hunting and you never know what kind of treasures you can find at the local Goodwill, Salvation Army or any other type of second hand shop. I love a great bargain more than just about anything else, but I don't love how I feel so grungy after pawing through the racks. Some nicer consignment shops require the pieces they sell to be dry cleaned immediately prior to taking them, but shops like Sal's and Goodwill aren't as discriminating.

If you're like me and get the heebie-jeebies when you think about wearing another person's dirty clothes, then this post is for you. I never wear a second-hand item without cleaning it first. Even if the garment still has the original tags on it, there's something about it being on a rack next to all the other potentially dirty clothes that gets my mind reeling and before I know it, I'm having nightmares about microscopic bugs infesting my closet. Ok, you really didn't need that visual, I know, but it's definitely something you should think about if you shop second hand.

I've bought clothes and accessories from vintage and thrift shops and not noticed their smell until I was home and it wasn't until then that I realized how overwhelming it was. Of course everything I buy second hand goes through the wash, but that doesn't always do the trick. Strong cigarette smoke, body odor and even some perfumes are absolute nightmares to get out. Fortunately, I have a few tricks up my sleeve for just such a situation.

For starters, make sure that you inspect every garment carefully in the store before you purchase.
1.) Look at all the seams to make sure they are all secure and free of holes or tears.
2.) Always check out the armpits and necklines for staining and discoloration- those are the areas that will have the worst discoloration. Deodorant may keep us from being stinky, but it is not always kind to our clothing.
3.) If the garment has a lining, check to make sure it is in as good shape as the outer part of the garment. Linings on coats, jackets, pants and dresses can be close to disintegration while the outside appears brand new.
4.) Hold knits and felted knits up to the light to look for moth holes. If your local thrift shop is warehouse-style and not particularly well lit, carry a small flashlight with you to get a really good look at the garment.
5.) Make sure all zippers and closures work and are fastened securely. The last thing you want is for a button or hook & eye to fall off immediately after you purchase.

Once you have determined the garment is in good condition and worth the purchase, go for it. Have it cleaned or take it home and wash it prior to wearing. If the garment still smells musty, or has a residual scent you want to get rid of (perfume, cigarettes, B.O., etc.), then grab a bottle of- you may be surprised- VODKA. I'm not kidding. Straight vodka acts as a disinfectant and deodorizer when used on clothing and even upholstery. Simply use a spray bottle filled with straight or slightly diluted vodka and saturate the garment, just like you would with a bottle of FeBreze. (I find it to be most effective if you spray both the outside and the inside of the garment.) Hang the garment in a well-ventilated area and let it dry. The vodka kills any bacteria in the garment and when it evaporates it leaves no scent behind. In my experience, vodka has removed all offensive odors from many different types of fabrics and textiles. In extreme cases, I've had to apply it two or three times before the smell would go away entirely. In those cases, it was usually the smell of stale cigarettes that was the culprit.

If a garment I see in a thrift or second-hand store has any kind of stain, I will always pass on it. Generally, the stains are old and set-in and I don't consider it to be worth my time to try to get it out. I would rather move on and find something that is stain-free. Occasionally, however, I won't notice a stain until I get home. In that case, I try to determine what it is and go from there. I posted a few months ago about getting different types of stains out. You can view that post here and apply the various methods to the stain you've found. In other cases, I may find I've stained a vintage garment myself. Usually it's that I've managed to get lipstick on the neckline or my foundation has rubbed off somewhere. In that case, I want to get the stain out, but because the garment is old, it's more delicate. I don't want to just spray it with Shout and toss it in the wash! That's when I go to the shower and pull out my clarifying shampoo. It doesn't have to be an expensive brand- in fact, I've had success with both White Rain and Suave brands in the past- usually they cost around a dollar or two at the most for a pretty large bottle.  To remove a stain using clarifying shampoo, simply take a damp washcloth and a small amount of the shampoo and massage the stain in a circular motion, allowing the shampoo to foam up a bit and continuing the motion beyond the stain. Rinse the area thoroughly and repeat until the stain is gone.

These tips can of course be used on clothing that has not been thrifted, too. Happy thrift shopping and cleaning!

Tuesday, October 19, 2010

Craigslist is my friend

I have a confession to make: I am a Craigslist junkie. I have sold furniture, clothing, shoes, accessories, kitchen items, home decor, even a fake Christmas tree on Craiglist. I've bought furniture, cell phones, books, a TV, and just this week- a SERGER! I can't even begin to tell you how thrilled I am. Sewing without a serger is not nearly as good. Sergers trim the edge of the fabric and then encase the edge in thread, which prevents fraying. Also, there are settings you can adjust that prevent puckering and stretching when you sew with stretch fabrics. All told, sergers are amazing. Look at the inside of whatever garment you're wearing right now and I can practically guarantee you'll see a serged edge:


I've been without one since moving from PA on September 17th and I barely lasted this one month without one. I started hunting on craigslist- both New Hampshire and Massachusetts sites. There weren't many posted, plus I didn't want to spend more than $200. Well, on Sunday evening as I was perusing the site, I saw a brand new serger listed for $100. Granted, it was not the most high-end serger on the market, but at that price, I would be happy even if it needed a tune-up at my local sewing shop. If you use craigslist at all, you know it can be a hassle- you need to be the first person to reply to the ad, or there are no guarantees. Actually, even then there are still no guarantees. Then, you need to coordinate with the seller, who could choose to sell to someone who replied much later than you simply because it is more convenient for them- perhaps the buyer lives closer or their availability to pick up the item is more open than yours. Maybe they offered the seller more money because they really wanted the item. Honestly, for every item I've "won" on craigslist, I've lost at least two or three others.

If you look at it like a hunting-type of game, it can be fun shopping on craigslist. In fact, I prefer the buying end of the site to the selling end. Although, luck was on my side for selling when I was moving out of PA- literally EVERY item I posted on craigslist sold almost immediately. There were even things I was torn over- like my baker's rack. I'd purchased it on craigslist three years ago for $50. It was the kind that broke down pretty nicely so storage wasn't really an issue, but given how much other stuff I had, I didn't want to take anything extra or unnecessary. I figured that it was a pretty easy item to replace once I got a new place up in NH, but since I loved it so much, I figured I'd post it for $60, that way I was making a small profit and that helped ease the hurt of letting it go. I did the same thing with my dining table. I posted it for higher than I paid for it and determined that if it sold, it was meant to be. I felt like the craigslist selling queen that week! I got rid of my baker's rack, my table & chairs, 2 book shelves, a desk, a fake Christmas tree (with all the decorations), a mission-style chair I'd re-upholstered myself and even some artwork.

I still enjoy perusing the "for sale" postings on craigslist just to see what's out there and what people are charging for various things. It always cracks me up when I see something like a couch listed for $600 or $700. For real? If I had that kind of money to spend on a couch, I wouldn't be shopping on craigslist! When I sell on craigslist, I price the item to move, except in the cases I mentioned above where I wasn't quite certain I wanted to sell. The desk I sold? $25. The Christmas tree with all the trimmings? $20. The table and chairs? $150. Not exactly bank-busting prices! I like the idea of an online community where someone who needs to get rid of something sells it a bargain price to another person who can really use it, but maybe can't afford to buy it brand new and full price. I sold my old dress form because it was too rickety and old for me. It went to a woman who is opening up a fair trade clothing shop, so I not only provided her with a bargain, but the form went to a good cause and that made me feel good! And now I get to peruse the site for a new dress form for myself!

When I told my mom that I was looking online for those two things- a serger and a new dress form, she said, "If you find one for a good price, let me know- it will be your welcome home/early Christmas present from me." So when I found the serger for $100, I knew it was meant to be. The brand is one that retails for around $299, so I couldn't pass up the deal. I picked it up last night, brought it home, threaded it, adjusted the settings and tensions and gave it a test run. It worked like a dream and I can't wait to use it on a project!

I have to admit that it feels as though every little detail of my move up north is working itself out tremendously. I won't bore you with all of those little details, but they are working themselves out incredibly. I hope my good fortune continues- it feels like God is watching over me and putting all the pieces of the puzzle exactly where they belong. And now to find that dress form...

Saturday, October 16, 2010

Pattern Magic

I haven't posted a blog in a few days, but it's for good reason. I was visiting my fabulous friend Melanie who lives in northern New Hampshire. I always have a blast with Melanie- just sitting and chatting, or out shopping for clothes and/or home decor, going out to eat or cooking in- it's always a good time. This particular visit involved all of the above, actually. We had a lovely couple of meals out at nice places like The Common Man and the Gypsy Cafe (get the nachos!), as well as some relaxing meals at home with her husband. We shopped at our favorite: Le Marshalles Boutique as well as Bella Funk, a great little boutique in Lincoln, NH. Melanie got a really fabulous dress that I'm hoping will end up on the blog at some point (hint, hint, Mel)! I managed to find some AMAZING pieces for the fall/winter- very versatile pieces that would be appropriate for work, or for a night out. More on those soon, I promise. Because what I want to tell you all about the most is the amazing gift that Melanie got me:

Pattern Magic by Tomoko Nakamichi

The copy pictured is in Japanese, but the book is currently available in English. There is a second volume that has not yet been translated (that I know of), but I hope they do it soon so I can buy it! This book is truly amazing, with incredibly beautiful patterns clearly outlined and explained. It's complicated stuff, but I hope it's not too complicated for me to figure out because I am dying to try some of these out. One of my favorite looks in the book is this bow-dress:

There is another beautiful pattern for a bodice that looks like origami-style basket weaving. Another has a beautifully draped effect that looks like the fabric is twisted, but it isn't! I may have to experiment soon with these patterns, but I can't guarantee you'll see results anytime soon. As I mentioned earlier, these are pretty advanced pattern-making techniques (for me, anyway).

Stay tuned for photos of my weekend purchases and (hopefully) samples of my experiments with the new pattern book! If you've used this book and have any feedback or advice, please feel free to leave a comment!

Enjoy the rest of your weekend, everyone!

Thursday, October 14, 2010

Done!

I finished the last details on my new work dresses tonight and I'll hopefully have pictures to show you next week. Why so long a wait? Because my amazing photographer friend Kate is going to take the pictures for me and I'm SO EXCITED!!! She's a remarkably good photographer and you can find her studio website here. She and her business partner Lara are two super talented ladies and I can't wait to experience what it's like to have one of them behind the camera! So, until then, you only get these teeny tiny sneaky-peekies:


No, I did not make that brooch- it was a gift from a great friend and this grey dress is the perfect backdrop for it, so I couldn't resist! And yes, there is a third dress- a red gabardine, but I couldn't get a good close-up photo of it for you. The light was bad, my photography skills are bad- the stars just weren't aligned for a sneak-peek of that one, so you will just have to wait and see the whole thing when the time comes.

I learned one major thing while working on this project: I need a SERGER! Really really bad!!! I used to hop on one of the sergers at AMT to finish my edges and holy cow did it make life easier. Now that I'm sewing exclusively at home, I have to deal with less than ideal equipment including a lack of a serger. I'd even settle for one of those 3-spool little rinky-dink ones for now. But I think I'll just save up, or maybe write Santa a letter this year. I tend to forget to ask Santa for things, but not this year!

Tuesday, October 12, 2010

Finally- Mom's Valances

If you've been following my tweets and reading this blog, you know I've been spending a lot of time sewing- new dresses for the new job AND valances for my mom's dining room. Well, I haven't been teasing you intentionally, it's just that I haven't had time to take pictures. The dresses look great, but I've been lazy with my hair and make-up lately PLUS I'm still stuck in my glasses and will be stuck in them for another 2 weeks, so I'm less inclined to get out and take photos. Yes, it's vain, I know! And as far as the valances go, they just hadn't been hung up yet, so there wasn't much point in taking a picture. And of course things can't be simple around here- the style of the new valances required a new set of curtain rods- decorative ones- so that had to be taken care of first: the purchasing, the mounting, the adjusting, etc. Finally, they are up:


The picture is blurry and the sun too bright and we hadn't yet "tweaked" them to make them hang perfectly, but you get the picture. I kind of like them.

Hopefully I'll finish the last of my three new dresses and get pictures taken soon. I have to install a zipper in th last one as well as hem it, add sleeves and some other minor details. It shouldn't take more than a couple hours later today. Tomorrow I'm meeting with the ballet company to discuss the costume work they need done, so I'll let you know if that's blog-worthy when the time comes. Speaking of the ballet company, they gave me a copy of last years performance, and I've been procrastinating on watching it. Maybe I should go do that now...

Sunday, October 10, 2010

Sewing and Sick

I'm feeling a little under the weather lately- honestly, between my conjunctivitis, broken (I think) toe, and now I feel a cold coming on, I'm pretty much a hot mess. My toe is feeling much better, thank you. It's still hideous-looking with a weird dark purple bruise. My eyes are better, but after the conjunctivitis passed, I experienced major irritation from wearing my contact lenses. The doctor told me to not wear them for another THREE WEEKS! And I don't know where this cold came from, but it's pretty mild so far. I'm hoping to rest and drink lots of water and maybe it will pass quickly without totally ruining my week.

I have a lot going on this week, but I am hoping to spend at least a day sewing some new dresses for myself. I made a fabulous new "work" dress on Friday. It's made with a wool/poly blend in a purple, grey and black plaid and I love it! It's very basic (like most of my dresses), but it's also very comfortable and I think it will be a perfect "bridal professional" look. I bought fabric for two more dresses- a grey light-weight suiting fabric and a bright red gabardine. I hope to spend some time today and tomorrow working on making dresses out of them. I was really inspired by all the dresses I posted from Modcloth the other day, but I'm making all three of these for the price of about one of those. I bought all the fabric and notions for about $80. After shipping, just one dress from Modcloth would be about that price. In fact, most are a LOT more expensive than that. I'm going to stick with the same silhouette that works so well for me, but vary the details and necklines and maybe some of the hemlines. I hope to finish them all by Wednesday, since that's when I start working on costumes for the ballet company. I don't want any personal sewing work hanging over my head when I start that contract.

I managed to finish the valances I was sewing for my mom yesterday- I mentioned those a few days ago. We selected some really nice fabrics and I managed to put the finishing touches on them yesterday afternoon. I'll take a photo of the finished look once they are actually hanging in the room. Until then, you'll have to be happy just seeing the fabrics together:


My mom was thrilled to find this toile pattern since her last name is Gallo and that translates to "rooster." She thought it was not only a pretty toile, but also quite fitting. Since her house is decorated in a traditional New England colonial way, I thought the check with the rooster was a nice combination. At first glance, someone looking at the valances wouldn't necessarily see the roosters, they will likely just notice it's a toile fabric. Looking into the room, it might appear to be very formal if all you saw was toile. I like how the checkered fabric helps to bring it down to a more casual level. And of course, upon closer inspection, the roosters add a touch of whimsy. What do you think? The final look will have dashes of light green- a button detail and the tab that slides over the curtain rod. I like the overall look and like I said, I'll eventually post a picture of the completed look. But for now, I'm headed back to the sewing machine to work on some more dresses for my new job!

Happy Sunday!

Saturday, October 2, 2010

Baby Fashion

It's not often that I venture outside of womenswear and even more infrequent are my forays into childrens clothing. However, while at a yarn shop with my mom this week, I saw the most adorable baby sweater EVER. I had to make it. I plan to give it to a friend of mine who has a 1-year old at home right now. I hope its not too small for him:

It kind of reminds me of a "Grandpa" sweater, but it's so precious when it's pint-sized!

I just love the wooden buttons on the variegated button band. That yarn choice was actually an accident- I ran out of the solid green yarn and had to choose another color to finish the collar and button band. I was going to do a dark brown solid, but I felt pretty lucky when I found this earth-toned variegated yarn to use. It actually has the same shade of green within the mix of colors, so it looks intentional even though it was practically an act of desperation.  


The pattern is unfortunately only available in baby sizes. I'd love to make matching ones for the parents of the baby this sweater is intended for! For those of you knitters out there, this pattern was literally the easiest pattern I have EVER done. You use one size needles (size 8 circular and dpns), it only uses about 150 gr. yarn in aran or worsted weight. In addition, it knits from the top down, so there are no seams to sew AT ALL. If you are interested in knitting this pattern, it can be found on Ravelry, a free site for knit and crochet. The name of the pattern is "Baby Sophisticate" and in total it only took about 10 hours of knitting to complete the sweater. I'd say my knitting speed is pretty average, so if you are an avid knitter, I'm sure you could finish it much faster than me.

If you are not a knitter, but would like a custom-knit sweater for a baby you know, just email me. I may add this to my Etsy shop, which is another way you could place an order for it.

Enjoy the rest of the weekend, everyone!

Sunday, May 9, 2010

Spoonflower custom fabrics

Have you ever thought about how cool it would be to design your own fabrics? I have. A few weeks ago, there was a special about Christian Siriano and his most recent line. He designed some really incredible prints using distorted photographs of the places that had inspired the collection. How cool is that?

Anyway, I stumbled upon a site that actually allows you to upload designs and create your own fabrics! How cool is that? The prices are very reasonable, too, especially when you consider the fact that you can truly customize the fabric. If a designer chooses, the fabric design is made available to the public to purchase as well and you can actually choose the type of fabric (to an extent). For anyone who quilts or sews, whether clothing or home decor, this site is a MUST SEE.

Some of my favorite designs:

daffodil_yellow

PA117 Umbrellas Blue

daffodillz_bak

bauble

Check the site out here. Leave a comment and let me know what you think of this site.

Wednesday, April 14, 2010

And another one...


My good friend Kate asked me to make her a dress and since my closet has gotten pretty full from all the dresses I've been selfishly making for myself, I decided to spread the weath a little. She sent me her measurements and told me that I had complete creative freedom. She loves lots of dresses on Modcloth, so I had  a good idea of the direction I wanted to go. I'm really happy with how this dress turned out and soon I'll post pictures of Kate herself modeling the dress. She's been kind enough to agree to let me post a picture of her on the blog. Whoo-hoo!

What I like most about this dress is the color combination. The olive green print actually works really well against the bright fuchsia sash- it's a very sophisticated color combination. I loved the contrast so much that I acually lined the dress with the same fuchsia and created a halter neckline that ties, so when the dress is viewed from the back, there's another surprise pop of pink:

So what do you think of my latest creation? I've realized lately how much I enjoy making simple, pretty, feminine dresses. It's actually quite relaxing. And it's especially rewarding when the recipient is happy with my work! Bonus! If you are interested in a "Bouchard Original" of your own feel free to email me or leave a comment with your email address.

On a side note, something was recently brought to my attention with regards to these dresses and skirts I've been making. A good friend of mine pointed out that often I casually refer to these as "Bouche originals." First, let me explain that "Bouche" is a nickname that MANY of my very close friends call me, so to me it's a very positive thing. I love that nickname and when I hear it, it's always said with such affection that I hardly realize that it could have a negative connotation. I failed to realize, or acknowledge that it's only one letter away from a not-so-pleasant word (use your imagination). When I hear "Bouche" I think "French" like "amuse-bouche" or just "la bouche." But I do understand where someone might be coming from who doesn't necessarily know that is my nickname and how I feel about it. They see "Bouche Original" and think I'm being flip about these garments I've made. So I apologize if I've offended anyone and moving forward I'll be referring to these pieces as "Bouchard Originals" instead.

Sunday, April 11, 2010

From Plain to Pin-up in 5 Easy Steps

My very good friend Kate is an amazing photographer. (Seriously, check out her site here and her blog here.) She and her business partner are two of the most incredible wedding photographers I have ever seen. This of course doesn't surprise me as I have always known Kate is remarkably talented. Their style is unique and fun and it looks like having them as your wedding photographers would be a blast.

Another really fun thing that Kate and Lara (business partner) do at the Studio Nouveau is "Boudoir parties." I imagine these are SO much fun. You'll have to contact the Studio to find out all the details, but having heard Kate talk about it, and of course seeing the photos gave me an idea. I'm going to teach all of you how to go from plain to pin-up in 5 very easy steps. There's a very simple formula to mastering this particular style, but holy cow does it have some major impact!

And yes I think this is an empowering way for women to dress, as long as they are choosing to do it for the right reasons. I would never want any woman to be merely objectified, but as women we can use how we look to our advantage and that is a powerful thing.

Step 1: LINGERIE

You don't have to actually wear nothing but lingerie to work the pin-up look, so don't freak out on me right away. The idea or inspiration behind ANY pin-up girl outfit is the feeling or implication of lingerie. That idea holds many meanings and for any girl wanting to create this type of look for herself, starting with an outfit that makes you feel great is the most important thing. If you are comfortable in a bustier and lacy panties, great, but not everyone I know would be okay wearing just that. So when thinking about your outfit, try to be inspired by lingerie. Sweetheart necklines are a great place to start and they are a flattering neckline for just about any woman. As for what exactly to wear? That's really up to each individual. Swimwear, dresses, even menswear can be appropriate depending on how you style it. Take a look at these vintage pin-up girl illustrations:


Not a single one of these five illustrations shows a woman in mere undergarments, yet each image is incredibly sexy because they each either show a hint of lingerie or they imply that it's there, just under the surface. Sometimes leaving a little to the imagination is a good thing. Read on for the next five steps, and at the end of the post are some pin-up outfit ideas.

Step 2: LEGS
You gotta show 'em, that's a given, but how to make them look their best? I recommend a pair of high quality fishnets. Capezio makes a great ones that make your legs feel instantly shapely and toned. They are available in black, white and three different shades of nude, so depending on your skin tone, you can match them pretty darn close. Style is #3000 and you can find them here. If you're going for a more bare leg look, obviously choose one of the nude shades. If you want to go for a more stylized look, then black is always a very powerful choice. In that case, I recommend taking it a step further and wearing fishnets or stockings with a seam up the back. Once again Capezio makes a great pair that even has rhinestones accenting the seam. (Style #3002 found here.) And for those of you who prefer thigh-high stockings with the back seam, they are easy to find. Some inexpensive (but effective) ones can be found here and here.

Step 3: LOUBOUTINS
Ok, they don't have to actually be Christian Louboutins, but the heels you wear should be killer. What makes Louboutins so appropriate for this style are two things: the red soles and the high spike heels.The red soles are obviously not necessary, but they add a great little punch of sexy color. And as far as the heels go, slim and sleek is key. Don't wear a "heavy" shoe. Thick, chunky heels appear heavy as do heels with too thick a strap. Your shoe choice needs to be a strong one that is also very feminine so go with a rounded or peep toe pump. Also, select a very high, but also very narrow heel. Did you ever wonder what it is about heels that makes you feel so sexy? It's actually completely physical- the psychological part is a result of the physical aspect. High heels cause the muscles in our legs and butt to flex which makes them appear incredibly shapely. In addition, because of how you have to stand in them, they actually cause your booty and bust to raise up and stick out just a little bit. But that little bit goes a looooooong way. So, no it is not purely psychological that heels make you feel sexy- they actually do things to your muscles and posture that makes you hold yourself in a much sexier manner.

Step #4: LOCKS
Hair is very important in terms of the overall look. You don't have to have long hair to accomplish a sexy pin-up look, but curls definitely help a great deal. If you want to be authentic and wear pin curls, more power to you, but even just adding some waves and volume will make a huge difference. (P.S. For great How-To videos for pin-curling your hair, click here and here.) Finally, don't hesitate to add an accessory to your hairstyle-a headband, a flower clip, rhinestones- whatever suits you.

Step 5: LIPS
Did you know that the concept behind rouge and lipstick is that when a woman is aroused, her cheeks flush and her lips take on a deeper hue? Fascinating, right? Make-up is essentially a means of creating that look of arousal and thats why every pin-up girl you see has bright red lips and rosy cheeks. It's no accident. To complete your pin-up look, select a flattering, but deep or dark shade in pink or red. The lips should be the focal point of your make-up, with rosy cheeks and smokey eyes helping to accent them.

So there you have it: Five easy steps to go from plain to pin-up: Lingerie, Legs, Louboutins, Locks and Lips. If anyone out there has ever done a shoot like Kate & Lara's "Le Boudoir" I'd love to hear about it. Leave me a comment and tell me about what inspired you to do it and what it was like. And if this isn't enough to get you started, here are some fun pin-up inspired outfits.

The Beach Babe:
Retro-style bathing suit, Modcloth, $89.99
Yellow color-block wedges, Make Me Chic, $22.65
Wide-brim beach hat, Amazon, $15.99

The Girl Next Door:
Pin-dot Dress, Modcloth, $54.99
Flower Hair Pin, Etsy, $13.99
Vintage Gloves, Etsy, $5.50
Patent Peep-toe Pumps, Vicious Style, $44.99

The Vamp-y Vixen: 
 

Black sequin corset, Oh Cheri, $69.95
Lace Boy Shorts, Snaz75, $19.99
Rhinestone Fishnets, Capezio, $52
Floral Choker, Etsy, $28

Thursday, April 8, 2010

Another creation

Remember my recent shopping trip in New York? I got the fabric I used to make this dress at Mood in the Garment District. I finally got around to making this fun, flirty dress with it. I didn't buy very much yardage, so the skirt ended up being a little shorter than I normally wear. It's far from obscene, though. In fact, I kind of like the length- it's a little more flirty, don't you think? I also like this dress because I jumped on the "exposed zipper" bandwagon:

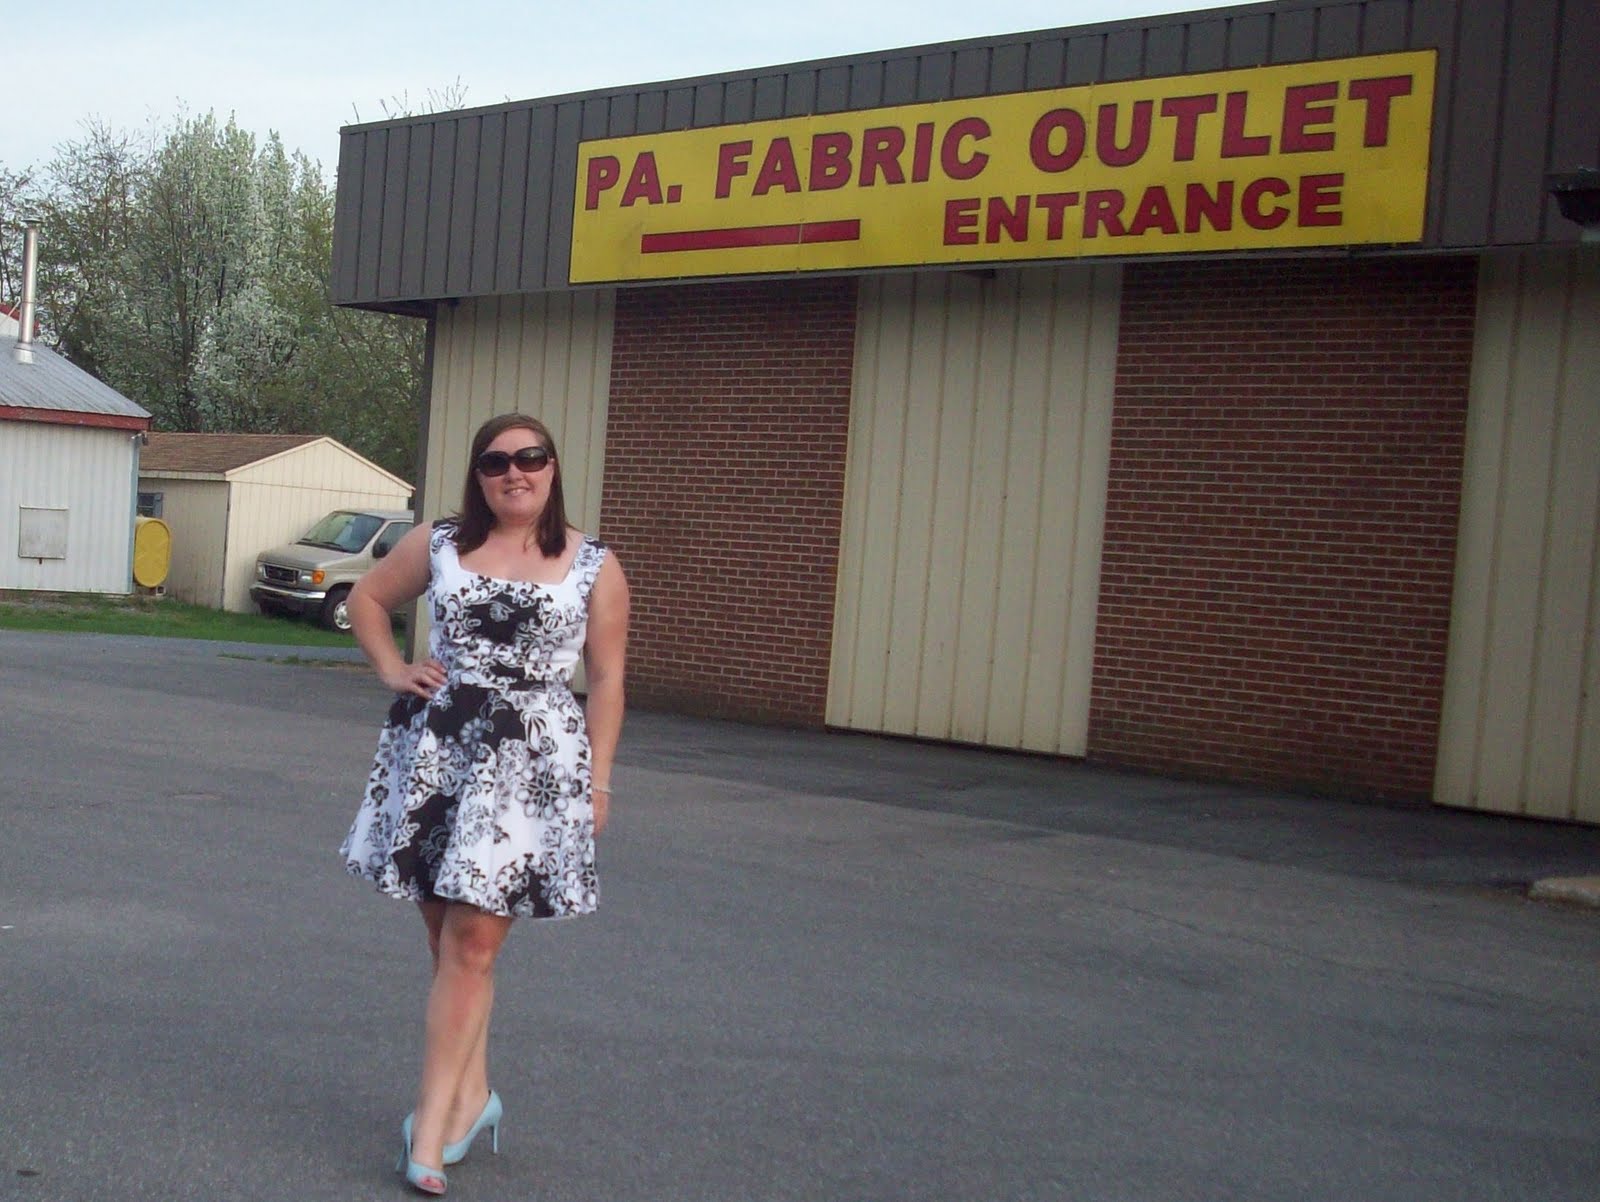
I have always felt that good design hinges upon great fabric selection. An amazing fabric can take an otherwise boring, simple dress and transform it into something spectacular. Unfortunately, it also works the other way- a poor fabric choice can ruin an otherwise spectacular design. If you live in the central PA area and would like to find someplace besides JoAnn Fabrics to shop for fabric and notions, I recommend the PA Fabric Outlet. It's actually where I took a couple of pictures this evening:

I've purchased SO many fabrics and trims here, mostly for work. It's one of those hit-or-miss kind of places. Sometimes I go there and wish I had thousands of dollars to spend on fabric. Other times I leave empty handed and uninspired. If you're willing to check back regularly, the Fabric Outlet can be your best friend. On this particular occassion I was only looking for a couple of ribbon options to use as a finishing embellishment on another Bouche Original that I plan to wear soon. I'll take pictures for you to see it.

On the drive home from the fabric store, I decided to stop and take some pictures near one of the many picturesque farms here. I saw a field of black and white cows and absolutely HAD to try to get a picture with some of them. Of course, they saw me coming and they were like, "We're outta here." Only one cow stayed behind, but she eyed me suspiciously the entire time. 
 

Please tell me you can see that evil look in her eye! She was like, "Why are you interrupting my dinner?" I tried to explain to her about the picture taking, but guess what- SHE'S A COW. I gave up because I don't speak "Moo." Anyway, I did manage to get a couple of pictures of the two of us:


When it comes to clothing with a busy pattern, sometimes it's best to just let the garment be the statement. I could very easily layer on all sorts of fun accesories, but I chose instead to keep it simple- a pair of pale blue open toe heels and a simple cocktail ring (to emphasize my recent manicure):


Well, it's late and I'm sleepy. Leave a comment and tell me what you think of this dress or of anything else that comes to mind). Have a great night!
Related Posts with Thumbnails