Thursday, November 8, 2018

Easy DIY- How to Make a Bow Tie

Percy, our incredibly adorable terrier mix looks really handsome in a bow tie:

As the seasons have changed in the last few weeks, I wanted a bow tie for him that was a little less summer-y. I found a cute black and red plaid collar, but couldn't find a bow tie to match. So, I decided to make one. It's so simple and easy to do and I actually bothered to document it so I could blog this incredibly simple DIY to share on the blog today. Go me! 

I started with some leftover red fabric from an old project and cut four rectangles about 2 inches by 3 inches (I didn't measure- that's just a guess) each: 

Next, I stitched around the edges, being careful to leave an opening on one side (between the pins):


Here's a sewing tip: When it's time to turn the corner, make sure the needle is down through the fabric. Then lift the presser foot up and rotate the fabric. Put the foot back down and continue along the next edge. 


Pro tip #2: Trim your corners before flipping the fabric around. 


Make sure to push the fabric into the corners to make them nice and crisp. Pro tip #3- use the end of a pencil or a chop stick or something: 

Iron your two finished rectangles, then stitch up the opening. You can hand-stitch or machine stitch, but since the stitches aren't likely to be seen, I just machined them.


Next step- lay one piece on top of the other and fold in the middle, accordion style: 


Next, stitch the folds in place. Again, you could do this by hand, or by machine. The only trick with using a machine is that at this point, the fabric layers will be very thick, so go slowly or you'll risk breaking the needle. 


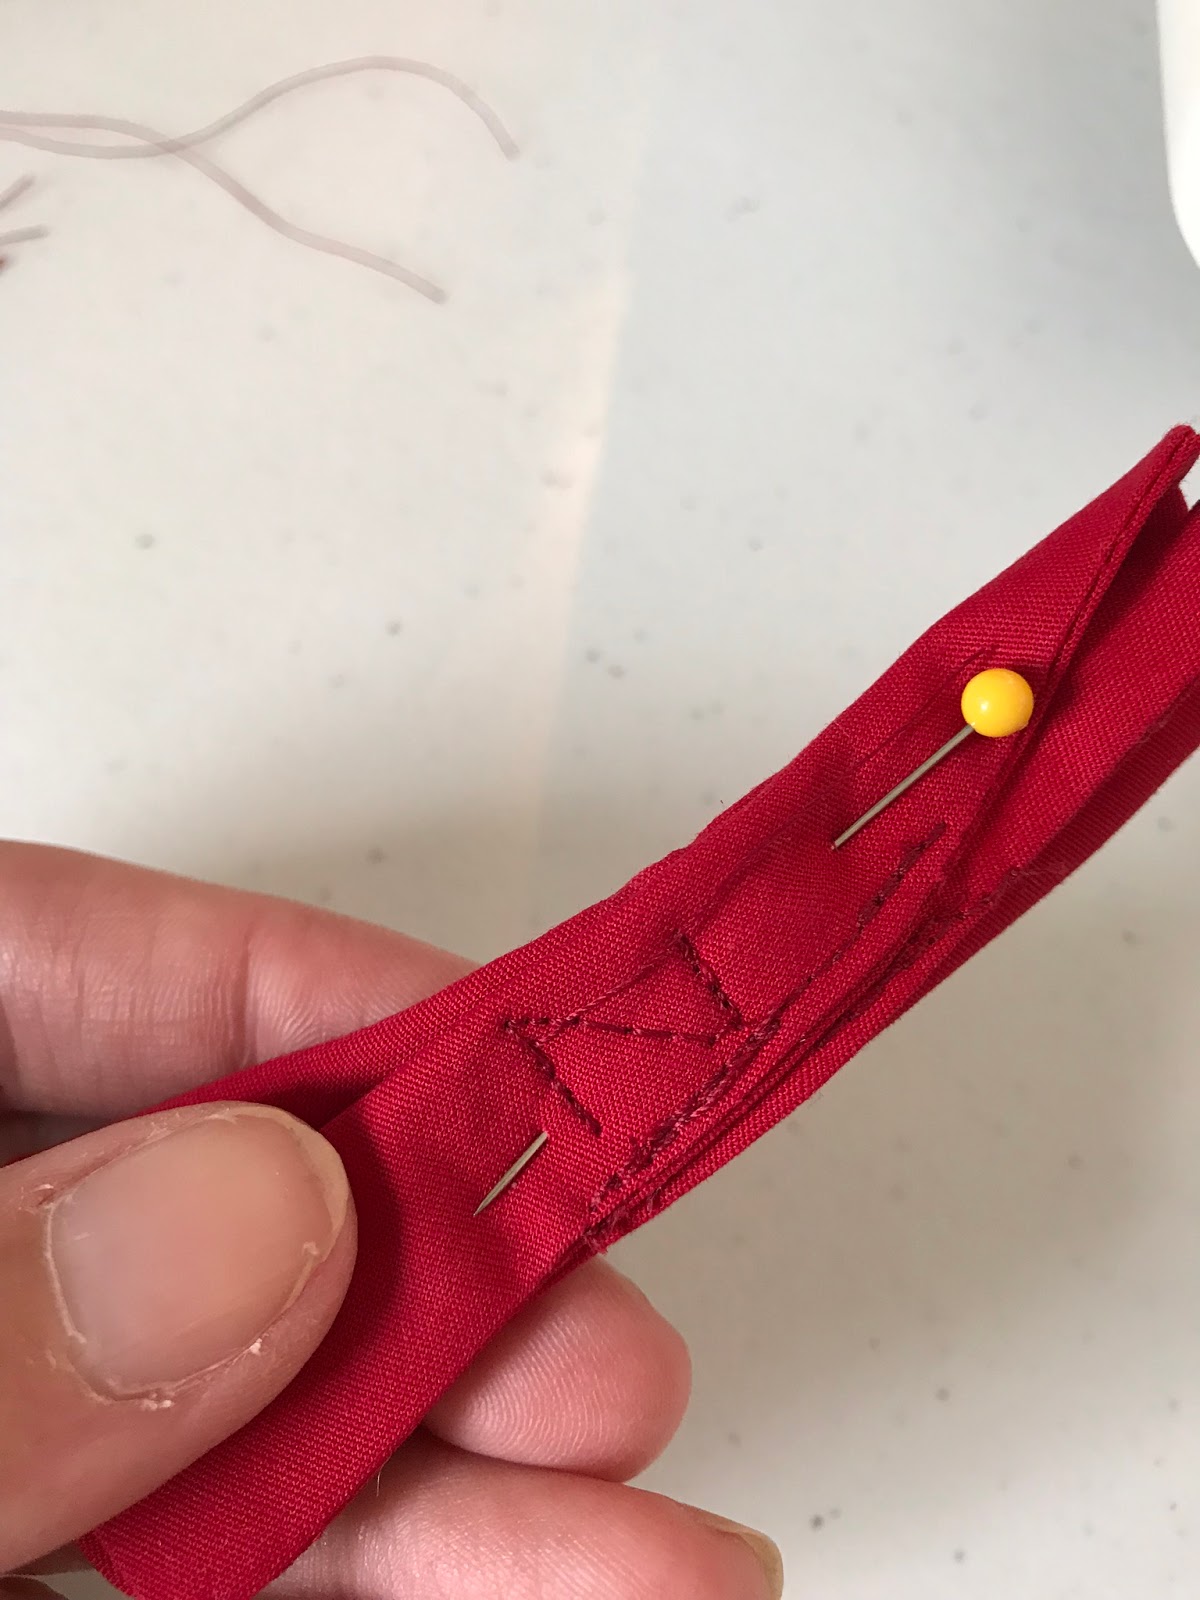
You can see I stitched a "Z" pattern, using the same technique with the needle/presser foot as the corners in the beginning. 

Now that you're at this point, the next step is to make the band that wraps around the middle of the bow tie. Start by cutting two strips of fabric, about an inch and a half wide and about 3 inches long. 


Stitch along the long sides ONLY. 


Next, you need to flip this right-side out. To do this can be a little tricky but fortunately I have this AMAZING tool that is made for exactly this purpose. Seriously, one of the best sewing-related purchased I've ever made. I believe it's called a "loop turner" or something like that. It only costs a couple dollars at the fabric store and it is worth every penny. 


The tool has a little hook on one end. You just have to thread through the two layers of fabric, catch the end with the hook and then pull the end through to the other end, flipping the fabric right-side out. Piece of cake. 


When you're done, press the edges. Next, sew a small bit of elastic to one end. It's easier to do this step now, but if you forget you can always hand-stitch it on after the fact. But try not to forget, because like I said, it's easier at this point in the process. 


Now that you have the elastic stitched, sew one end of the small band to the other, creating a circle. You'll have to do this part by hand. 


Once that's all stitched, it's time to slip the bow through the circle you've created: 


You can see I still haven't cut the thread from hand stitching the band into a circle just yet. That's because I used it to also stitch the circle to the bow to make sure it won't ever slip out. This step isn't 100% necessary, but it definitely makes it more secure for something that will be getting daily use. 


Once you've sewn the two pieces together, just trim all your threads and slid the bow tie onto the collar! Done! It's such a quick and easy project you could easily crank out half a dozen in an hour or so. Which I might just do with some other fabric I have in the bins: 


My model was less than cooperative, but you get the idea: 


I mean, it's pretty freaking cute, right? And the nice thing about this project is that if you don't have a sewing machine, it will still be a pretty quick and easy project with just a needle and thread. Let me know what you think!


Tuesday, November 6, 2018

Photo DIY- Gallery Walls

I recently saw something super cute online called a "Time Capsule Gallery Wall." I'm sure you're all familiar with the concept of a gallery wall of photos, but the time capsule takes it a step further and incorporates various objects and sentimental pieces with the photos. I decided to try out the concept in our house and see how it turned out. Another friend said, "It sounds a lot like scrapbooking." She's not wrong. But instead of it all going into a book, it all goes onto your wall.

The biggest problem I encountered in putting this together was finding the other "stuff" to include. Turns out, I'm not incredibly sentimental and I've saved almost NOTHING from the last few years worth of special events, trips, holidays, etc. I had to get a little creative, but I think it all worked out.

I started in the basement, going through a lot of the boxes and bins we moved into the house, mostly looking for frames I could use. I found plenty of frames, but I also found something that ended up making the project work out a lot better than I'd anticipated. I found the copy of our wedding vows that Brance, our good friend and officiant had used on the day of our wedding. He'd written notes all over the typed "script" that I had sent him, and seeing his writing all over those pages brought back such great memories. It was a keepsake I didn't even know I possessed and when I found it, it felt like I'd discovered buried treasure.

I took a quick visit to Goodwill and bought another half dozen or so frames, printed about a million photos at my local CVS and got to work.


I had to spend quite a bit of time cleaning up most of the frames, but it's amazing how just a little Windex can make a huge difference. After that, I set about picking photos for different frames, and going through the various "stuff." I wanted to represent as much of our lives together as I could, but I had so little from the last 3+ years, I had to get creative. For example, I never saved any of our boarding passes from trips (also, I almost always used electronic ones), so I printed out copies of a couple. I got as creative as I could with what I had to work with. In the end, I had enough for two gallery wall collections. The first was wedding-themed with the vows I'd found as the centerpiece: 


The vows are in the center frame along with two cards we received from loved ones that day and a wrapper from our favors- soap handmade by my mom. I also framed our invitation (top middle) and the cover of the song book from the sing-along at our wedding (bottom left). The rest are photos from our wedding day. I love how it turned out! 

The second gallery wall had a bit of a travel theme to it: 


The photos are mostly from various trips we've been on together. Other items include the key to our first home we bought together, boarding passes from one of our trips, a stamp in one of our passports from another trip, a birthday card, the menu from Moxy where we had our first date, foreign money from a few of our trips and a seashell I brought home from our honeymoon in St. Maarten. No matter what I do, I can't seem to get that white frame to sit straight, but other than that, I'm really happy with how the whole installation turned out. 

You're probably wondering "Where's Percy?" Well, I made a little corner just for him in our living room: 


The photo on the left is literally the moment we all met and became a family. I still get emotional looking at it.

I liked working on this project because it gave me an afternoon to reflect on all the blessings I have in my life and how fortunate I am to be building a life together with Sam (and Percy). I also like the idea of creating more gallery walls like these years from now. Maybe I'll be better about holding on to sentimental things so that I'm not left scrounging for items next time!

Let me know what you think about this project. Would you do something like this in your own home? What kind of objects would you include? I wish I had more 3-dimensional things to include, but maybe someday I will!

Thanks for reading!

XOXO

Sunday, November 4, 2018

Trying Not To Kill My Final Touches

SO many blogs and home decor stylists say that the best way to add finishing touches to a room, as well as a little color and vibrancy, is to have a lot of PLANTS! My only problem is that I tend to have a bit of a black thumb. Keeping plants alive is a total mystery to me. So you can understand why I might not want to spend a fortune on them, right?

It's not really the plants that are expensive so much as the planters that seem to cost a fortune. I shopped at Home Depot and Walmart expecting some good prices on both plants and cute planters and came up practically empty handed. I wanted to add a lot of plants around the house but the pretty planters were going to break the bank. I decided to try to get creative and went over to Goodwill instead. I found a huge assortment of containers that were suitable as planters and filled up my shopping cart. I then bought an assortment of plants at Walmart and Home Depot that were relatively inexpensive and hopefully low-maintenance.

The key to using non-planters as planters is to provide drainage, or at least that's what I read on the internet. In addition to the plants, I also picked up a bag of river rocks and some potting soil at Home Depot. All in, I spent about $60 on planters, plants and potting supplies.

Next, I brought everything home and re-potted all the plants. I started with a handful or two of the river rocks in the bottom of each "planter" then loosened the roots on the plant and potted it with some fresh potting soil. I followed it up with some water and lots of loving words (they say it's good to talk nicely to your plants) and now I'm crossing my fingers and hoping for the best. I'm also planning to do some research into the different plants I bought so I can find out the best way NOT to kill them all.

I also re-potted two pothos plants that I've actually kept alive for several years now. I wouldn't say they've thrived, but they're not dead, so I'm calling them both a success.

Most of the plants ended up in the dining room with the larger ones in the living room. Wish me luck as I try to keep these bad Larry's alive and kicking!


I also found this shelf-thingy at Goodwill. It was a dark, caramel wood color, so I just painted it with some of the leftover pale yellow paint from my dining table project and it gives a little variety to the heigh of the plants on the windowsill. 


I might try to grow some more pothos plants by taking clippings off this one. Again, WISH ME LUCK!

Friday, November 2, 2018

Living Room Finishing Touches OR Just An Excuse to Share My Wedding Photos

Our living room has by far been the room with the most put into it with new chairs, throw pillows, up-cycled end tables, and finally art on the walls. Well, one wall, anyway. I don't know what it is about hanging things up on the walls in the new house, but I've been SO nervous to put holes in the walls. It makes no sense. I know I can always spackle and re-paint and it's really no big deal. But something about it has just been hard for me.

Our long-term plan for the living room is to invest in a much larger, nicer flat-screen TV to mount on the wall behind the piano. That left me the wall behind the sofa to play with for the time being. I have always wanted larger prints from our wedding, but I felt like investing in those pieces when we lived in the apartment was silly. Now that we've bought our own home, I'm gradually working on getting prints of our favorite wedding photos to hang up around the house. The wall behind the sofa was the perfect place to start.

I happened upon a sale on 11X14 inch canvas prints on Snapfish and I just couldn't resist. They were only $15 each! I know they aren't the highest quality canvases, but guess what? The highest quality canvases come at a high cost. Anyway, there are SO many photos from our wedding that I would love to have blown up and printed and hung all over the house, but that might get a little cray cray. So, I chose a set of three pictures that are meant to be grouped together and ordered them during this amazing sale. I'm completely in love with how it turned out:


The sign below the photos was a wedding gift from Sam's coworker Lindsay and much like printed photos from our wedding, I didn't hang it until we were in our new house. In our old apartment, we kept it out, but never found a great spot for it. I always planned that when we bought our own house, I'd find a nice spot for it. 


I can't write this blog post without giving credit to our wedding photographer, Chris Keeley. When I first saw a wedding he photographed, I made a mental note to reach out to him if I ever got engaged. Just two years later, he photographed our wedding. Having Chris as our wedding photographer was so important to me, I actually chose a date partly based on HIS availability. I had three wedding vendors that I was intent on hiring and he was one of them. The other was my make-up artist, Joanne of Joya Beauty and the third was our videographer, LMV Productions

I definitely want to print more photos from our wedding, but it's really hard to narrow it down! I look at our wedding album often- it's in the drawer in our coffee table- if you ever come visit, ask to see it because it's kind of amazing. I think that photography and videography should be at the top of your list when it comes to wedding planning. After all, photos and video are really all you have to look back on afterwards. One of my favorite traditions for Sam and I is sitting down together on our anniversary and watching bits and pieces of our wedding video and looking through the photos in our wedding album. I love hearing his voice crack during our vows. I love seeing the faces on our guests when they are told it's a wedding, not an engagement party. I love listening to the singing around the piano of all our guests- our closest friends, family and loved ones. If you invest in anything for your wedding, invest in capturing the memories. The food, the flowers, dare I say it- even the dress- are only for that day, but the pictures and video can last forever. 

Anyway, I'll finish up this post with a handful of some of my other favorite wedding photos. Why not, right? It was a beautiful day! And let's be honest- I'll use just about anything as an excuse to show off our wedding photos. I'm a little shameless like that. 


And let's just round it out with a photo of the living room once again, but this time featuring the cutest Habashy:


Have a fantastic day, everyone! And thanks for reading!

XOXO

Related Posts with Thumbnails