In addition to researching the ladder DIY projects, I'd also been shopping around for one that was already good to go. I mean, why not? But truthfully, even the cheapest second hand ladder was still at least $60 and usually a little more shabby chic and rustic than our esthetic. Given the cost of wood, I decided to go the DIY route.
Just about every one of the DIYs I found incorporated wooden dowels for the slats. I knew I wanted to use wood that could also double as a shelf, rather than only serve the function of holding a towel. I also noticed that all the "super easy!" and "sooooo simple!" DIYs I found, none of them really addressed the issue of the bottom of the ladder needing to be slightly angled. You'll see what I mean later in the post.
I got up early on my day off last week and went right to Home Depot. I had read somewhere that they will cut wood for you. As I do not own power tools, or really very many tools at all, this was key to the project. I picked out my wood- 3 pieces of 1X3X8 "Common board." Basic and about $6 per piece. I had two of them trimmed down to 63 inches and another cut into 5 18-inch pieces. I would later learn that my math was off and I would only end up using 4 of those pieces.

The sign to the right explains their "Lumber Cutting Policy" which is that the first two cuts are free, the rest are 50 cents. But they didn't charge me anything despite needing more than 2 cuts.

Percy was very patient while the wood was being cut. He also made a friend there who gave him bacon-flavored dog treats. No wonder he loves coming with me to Home Depot.

All my wood cut to size.
I also picked up a nice color stain while I was there, bringing the total spent on supplies to just over $20. In addition to that, knowing I would never be happy if the bottoms weren't angled, I picked up a $10 hand saw. An investment in future DIY, in my opinion.
When I got home, the first thing I did was cut the bottoms of the long pieces. I wanted an angle between 10 and 15 degrees so that when the ladder is leaning against the wall, the bottoms are flush with the floor. I used my hand saw for this and it was surprisingly easy!

I totally nailed it.

Once I had the bottoms trimmed, the next step was to sand all my pieces and stain them with the stain I'd bought. This was a quick and easy process. I used the extra pieces of wood as drying racks for the stained wood pieces.
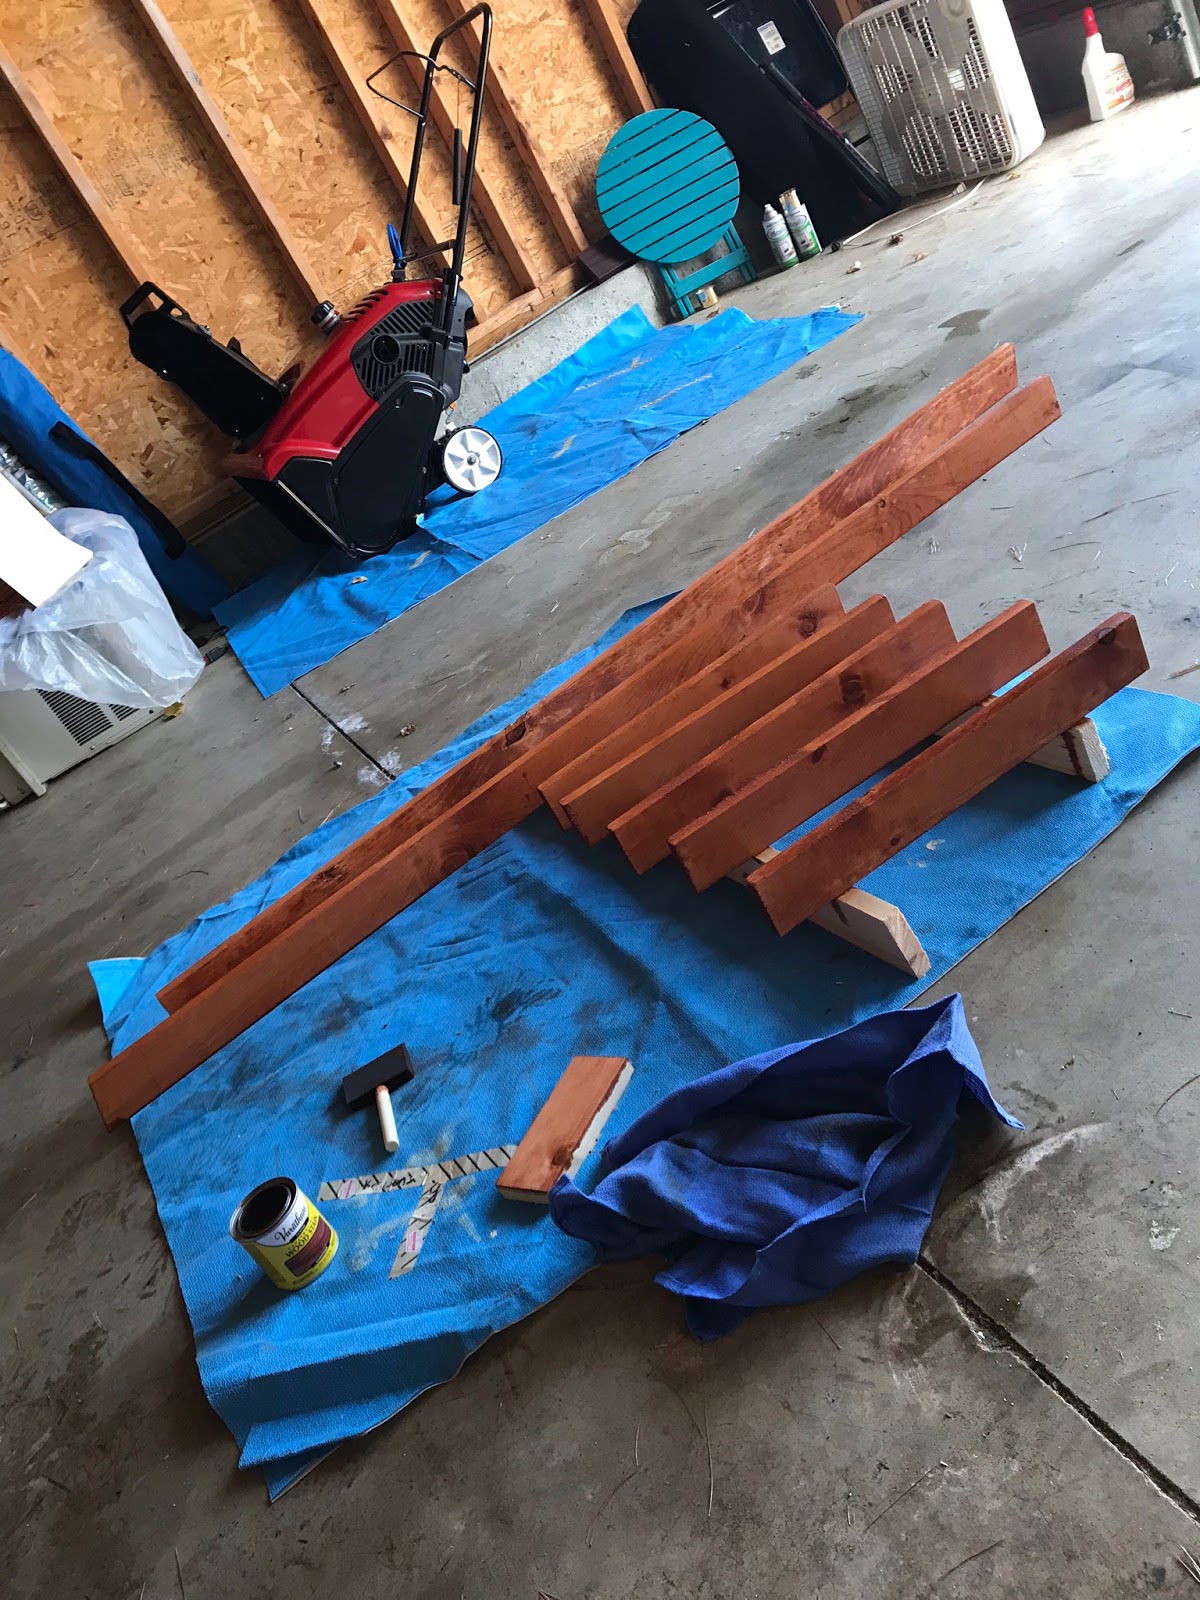


How pretty is that color? I love it.
The next step was to wait for the stain to dry, so while waiting I cleaned the house and then my building assistant and I decided to watch some HGTV for more inspiration.

After chilling out for a few hours, we went back into the garage to assemble the ladder pieces. One of the tutorials I'd found online said that you put the rungs of the ladder about 18 inches from the bottom, then 13 inches apart from there. The tutorial said there would be 5 rungs. I ran out after 4. Math, not my strong suit. Or maybe not THEIR strong suit. Or maybe I just mis-remembered the tutorial. I did read about a dozen of them after all.
Since the ladder was going to lean against the wall at an angle thanks to my sawing of the bottoms, I wanted to attach the rungs at the same (ish) angle so that they would be able to function as shelves, too. To do this, I measured the distance from both sides of the angled bottom, marked each side of the ladder side, then connected those two points with a line. This would serve as my guide for attaching the rungs.

Next, I pre-drilled holes in the sides on each of the angled lines I'd drawn. I did this because I was originally planning to use screws to attach the rungs to the sides.

Turns out the screws I had were not the best plan- too big for the wood I'd purchased. Since this ladder is not meant to EVER be climbed and the most weight it will be holding is a towel or two and maybe a candle or small plant, I decided to use some finishing nails instead. It was much easier. And fortunately the pilot holes I'd drilled weren't too big for this change of plans.

Once the rungs were nailed in, that was it! Done! I let the stain dry for a full 24 hours before using the ladder. It's perfect for the space and I'm so proud that I made it myself!!!


I didn't really get the rungs perfect- they aren't exactly the right angle and they're not all consistent, but the top one is actually perfectly level, and that's the one that I'll probably use as a shelf more than any other, so that's good. Considering my lack of expertise and the appropriate tools, I'm actually thrilled with how this turned out.
And that is actually it for the house DIYs on the docket. I do plan to re-do the bathrooms entirely at some point, but for now this ladder towel holder is a good start. Let me know what you think I should tackle next! My list is done!


No comments:
Post a Comment