I'll try to keep this post succinct but there are a lot of details to address. Let's start with FOOD. So many guests brought amazing dishes, but since I don't have those recipes, I'll stick to what I prepared.
First up, the ever popular Pumpkin Sausage Lasagne. This dish never fails to dazzle, so if you want to really stand out at your next potluck, show up with it. My version takes the Rachel Ray version in the link and doctors it up a bit. The main difference is in the sauce. Her recipe doesn't make nearly enough (in my opinion). I like my lasagne sauce-y, so instead of 3 cups of milk, I use 5 and I add an extra can of pumpkin. This makes more than enough for the pan to be nearly overflowing, so I usually put the baking dish on a baking sheet for any spillage to catch.
You will need a LARGE pot for the sauce.
The second major change I make is adding TONS of grated mozzarella. For this party, I think I bought a package of 4 cups shredded mozz. Every layer gets a generous handful or two and the remainder goes on top for a creamy, cheesy topping. Don't be mistaken- the mozzarella does not replace the parmesan in the recipe. It's IN ADDITION. Wear your stretchy pants.
Hands-down the MOST popular dish at Friendsgiving was the "World's Best Mac n' Cheese." I first tasted this recipe at a Thanksgiving years ago at my BFF's in-laws, although they weren't yet her in-laws at the time. Anyway, it was a life-changing mac n' cheese and I highly recommend you try it. For the party I doubled the recipe and the dish was scraped clean by the end of the night.
Sooooo cheeseyyyyyy!
I also made a large charcuterie and chip/cracker/dip spread:
I love this type of spread because there's something for everyone. I also love how easy it is to mix store-bought with homemade and have an enormous variety of textures and flavors. I did store bought chips, crackers, veggies, fresh and dried fruit, meats and cheeses. The dips were a mix- some store bought, some home made including an all-time favorite black olive and garlic tapenade. SO easy!
In a food processor, combine 5-6 cloves fresh garlic with 2 drained cans of black olives and a bit of olive oil. Make it smooth, make it chunky- whatever your preference. Sometimes I add pine nuts if I have them.
Next were my mom's famous stuffed dates. Also SO easy!
Slice medjool dates open "butterfly" style and stuff with cream cheese and either a whole walnut or whole pecan. My mom usually rolls them in sugar, but I opted to drizzle them in honey. Always a hit.
I also decided last minute to whip up an "everything but the bagel cheese ball. I combined 1 1/2 packages cream cheese with about 1 1/2 cups shredded cheddar, salt, pepper, garlic powder, and about 1/4 cup chopped fresh chives. Once incorporated, I rolled it into a ball and coated it with Trader Joe's "Everything but the Bagel" seasoning.
We had a bar of a bunch of different wines, beers, liquors and I made a Honey Crisp Apple Sangria. Again, I doctored the recipe up a bit for the party. I bought a box of wine, which I thought would be tripling the recipe, but turns out the box had the equivalent of almost 6 bottles of wine, so my proportions were a bit different from the recipe. My version of the recipe was something like this:
1 box Franzia red wine
1/2 gallon apple cider
1 cup orange juice
2 cups brandy
6 chopped Honey Crisp apples
1 large sliced orange
1 large sliced lemon
juice of one more lemon
12 cinnamon sticks
I skipped the club soda and hoped for the best. This drink tasted like fall. It was perfection. I wish I'd remembered to put out cinnamon sugar for rimming the glasses, but you can't get everything right all the time, right?
Ok, on to the decor!
I kept it simple with basic decorations in the living room where we have yet to hang any artwork (or actually, a new flat-screen TV):
I also put candles pretty much everywhere and wrote a quote on the chalkboard sign in our dining room. It was a big hit:
Read the fine print. LOL
I also wanted to make sure my guests were taken care of in terms of the more indelicate needs, so I put these in each bathroom:
The sign is a little hard to read. It says, "Friendsgiving Guests, Please help yourself to whatever you need and if you need something you don't see on the tray, just ask Renee or Sam. Just don't ask Percy. He's terrible at anything other than sleeping, eating or being adorable." This was a quick and easy DIY to show our guests we'd thought of their potential needs beyond just food and drink. Most of the items were already in the house. I just bought a bag of Life Saver mints and the eye drops. Other items I put out included tampons, band-aids, hand cream, Advil, nail files, Shout stain removing wipes, a lint roller and some Tums antacids. I'm pretty sure most of the items were used throughout the night, so it was worth the time and effort. The trays and little dishes to hold the various items all came from the dollar store. All told, this project (for both bathrooms) cost less than $10. Of course if you have to buy some more of the items, it could run you a little more.
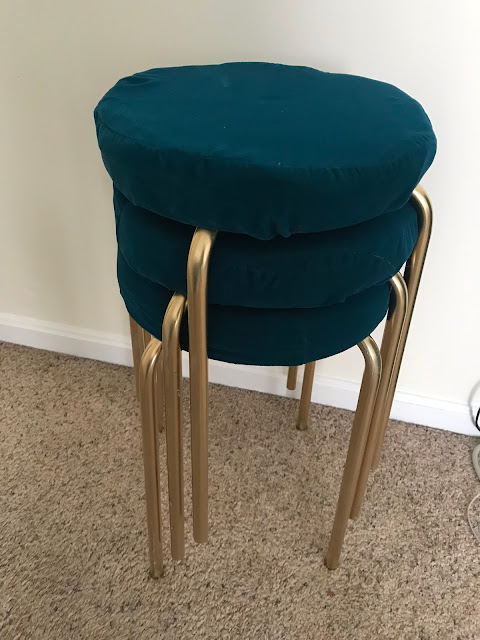
One of my final DIY projects was to ensure we would have plenty of seating. You may recall my vanity make-over where I upcycled an Ikea Marius stool. Because the stools were so cheap, I had bought 3 additional with plans to eventually do the same or a similar upcycle down the road. Friendsgiving was the perfect excuse to finish the project.
I made them all the same as the vanity stool so they can actually function as a set of four. I love that they are stackable so when not in use they don't take up much space. They all got used throughout the night so they were a worthwhile project.
Finally, in putting together my outfit for the night, I realized all of my fun party fascinators were lent out and I had no time to get them back. I hopped into my craft room to see what I could find and came up with this little headpiece that ended up being PERFECT.
And in a strange twist of fate- the feathers are actually turkey feathers! Gobble gobble!
I didn't get a great photo of the headpiece on me, so here's a picture of it on its own:
Can you believe I had all these supplies in my craft room? Just waiting for the perfect project. The base is a pre-made piece I bought from a millinery shop in NYC. The feathers, as I mentioned are stripped turkey feathers. I love their iridescence! Finally, I covered up the hot glue holding the feather stems in place with a little black satin ribbon. But how does it stay on my head? Easy!
I simply stitched a couple of hair clips to the back. Done. You could also stitch a comb if you prefer. Given how short and fine my hair is, I prefer the clips- they feel a lot more secure on my head.
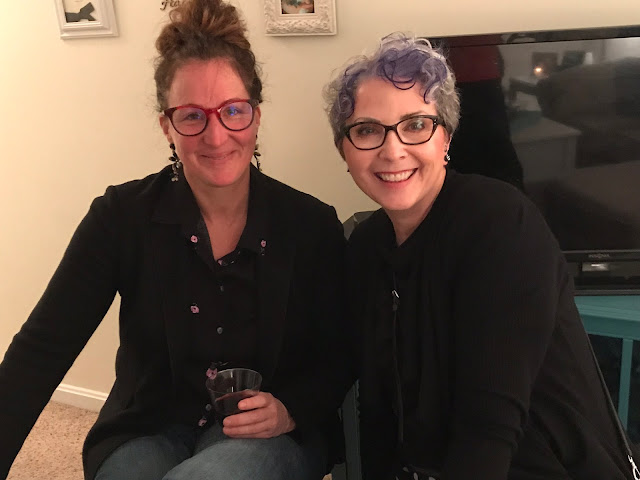
Lastly, here's a lovely montage of some of our guests enjoying themselves:
Who wore it better? LOL
HAPPY FRIENDSGIVING!!! What should we do differently or better at our next Friendsgiving? Leave a comment!


No comments:
Post a Comment