... At least not in the clothing sense. This post is actually about a little renovation project that I recently completed and I'm way too proud not to share it! And to be honest, it's still about personal style and putting your best foot forward, so in that sense, it's perfect for my blog! Who knows? Maybe I'll do more projects like this in the future and blog about them, too! It's my blog, so I guess it's my rules, right?
Anyway, enough intro. Let's get to it. Almost a year ago, I submitted a proposal to my boss and owner of Madeleine's Daughter, Elizabeth. I suggested that we re-decorate the Store Manager's office. I had observed how much that office is used and I felt it wasn't a great representation of the store. We interview potential new employees in that office. We meet with vendors in that office. We have weekly manager meetings in that office. We do a LOT in that office. Anyway, it was half-joke, half serious that I submitted the proposal. She read it through and said that while it wasn't a bad idea, perhaps the Store Manager- Juhree- and I could focus a little on keeping it neater first. Hmmpf.
Well, about two weeks ago, a mutual friend posted on Facebook that she was getting rid of some office furniture. She was practically giving it away and in the list of items was a sleek, slim desk with a hutch that fit perfectly into my original proposal. I mentioned it to Elizabeth. I said that maybe this was a sign that it was time for the renovation proposal to come out from under the other files on her desk. She pulled it out, looked it over again and said, "Okay, what if I were to give you a shoestring budget? Something like, $500. Could you do it?" I jumped for joy- literally. I may have even said, "I can do it for $250!"
In the end we agreed that I could spend up to $500 and not a penny more. Of course for the first week of the project, I was determined to keep it around $250, but after a few trips to Home Depot to do some price shopping, I quickly realized that was an unrealistic amount to aim for. So, with $500 and a little creativity, I completely re-decorated her office in just a couple of weeks. Here are a couple of "before" photos:
What a cluttered mess, right? And can we talk about the chairs around the table? Not exactly "eclectic." More like, "schizophrenic." Also, I hated Juhree's big, faux-leather, black office chair. It looks like something that belongs in a cubicle.
The floral chair on the right was my "jumping off" point in terms of inspiration. It was one of only two pieces of furniture that not only remained in the office, but also remained unaltered. It's pretty, it's girlie and it's light, so it stayed.
Tacky bridal advertisements were the ONLY decor.
The challenges I faced in perking up the office included:
- Absolutely ZERO natural light exists in this office. There are no windows at all and just two overhead fluorescent lights.
- In addition to the lack of natural light, the walls were painted a deep coral, although they read more as a dark red in the photos. At the time that Juhree chose this paint color, it didn't bother me, but over time I've come to detest it.
- Oppressive, mis-matched furniture that barely functions and only seems to clutter the room and make it feel small and confined.
- Obviously a shoestring budget is never ideal, but I'm a firm believer in the idea that a little creativity and a lot of elbow grease can make up for many dollars if you're willing to put in the effort. I was.
My goals included:
- Make the office warm and inviting- a place where people are happy to be.
- Achieve a level of decor that is representative of the company as a whole. (If you've been to MD, you know that the decor in the store is stellar and is a visual representation of our high standards throughout the company.)
- Ensure the functionality of the office as both a meeting space and the area where Juhree does the majority of her work. Form without function would just be a waste of Elizabeth's money.
Here's what I did:
First, I picked up the desk. I wish I had a better photo, but this is the only "before" one that exists. It's from the original Facebook post advertising its sale:
The desk I bought is the one in the upper left. It came with the hutch for a $50 donation to a charity of my friend's choosing. If you're interested in donating, here's the
link.
Next, I hit the thrift stores. I lucked out and happened to walk into Salvation Army on Half-Price Furniture Day. I walked out with these chairs for a grand total of $5.99:
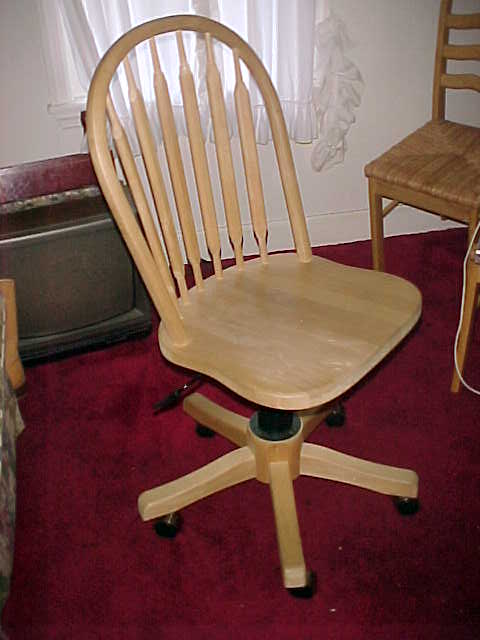
I also got a simple wooden chair at Saver's for $6.99. I didn't take a "before" photo of it by itself, but you can see it in the first "before" photo of the office up above. It's the one with white back and legs and a stained wood seat.
I made arrangements to pick up the desk later that week and then I hit craigslist like it was my JOB. I found the following gems almost immediately:
$25 bookcase
$12 swivel office chair.
My project started on Friday. By Sunday, I had acquired all the furniture I would need to implement my design. Of course, none of it was the right color, but I had a plan for that, too.
Next, I went to Home Depot and Joann Fabrics for some supplies. I purchased paint samples for the wall and furniture colors. You can see in this photo where I painted the "swatches."
The middle "swatch" was the hands-down favorite of the entire staff. It's called "Wildflowers" by Benjamin Moore.
At Joann Fabrics, I purchased fabric to re-upholster the metal chairs I found at Salvation Army. I bought a yard just to be safe, but I probably could have done the project with just 3/4. I went to the store with a 40% off coupon, but as luck would have it, the fabric I wanted was on sale at 50% off. I paid $17.49 for it. That coupled with two cans of Rustoleum spray paint in a warm cream color was all I had to buy to transform the two chairs into this:
Adorable, right? I'm in love! The mint in the center is just like the color of the "jumping off" chair and the shades of yellow include the "Wildflowers" color, too! It could not have been more perfect fabric!
With the completion of the chairs, and the choosing of the paint, I realized that my project was well on its way to success, but there was one major road block. The desk. Go back and look at the first photo and you'll see what a monster it is. Really, go ahead. I'll wait.
...
...
...
See what I mean? My original proposal suggested we donate the desk just because that seemed like the easiest way to get someone to haul it away. But then I had an optimistic moment and I posted it on craigslist for $75 or best offer. I admit, my ad was a little ridiculous:
Apparently, on Craigslist, ridiculous works because THREE HOURS LATER it sold! The next day, the desk's new owners came and hauled it away and they even paid the full $75 asking price. With the desk gone, there was nothing left to stand in my way, so I recruited some painters and made plans for a painting party. The scheduled day was Wednesday July 3rd, since the store was closed both that day AND the next day for the 4th of July holiday. I figured that gave us a day to paint and a day for it to dry completely. If all went according to plan, Friday July 5th (today) was to be my "final touches" day.
There was a week between the desk selling and the painting party. While at work, I stayed focused on the brides I was dealing with, but every minute outside the store was spent obsessing over the details and finishing touches. Juhree had a bit of a meltdown when her old desk sold. She freaked out a little about having to come up with all new systems for her workflow. I assured her that it was a top priority of mine that the office be a place that functioned well for her. We came up with solutions that made both of us happy and only cost a few more dollars to implement. Teamwork, baby!
Anyway, on Wednesday, everything went according to plan. My volunteers were pretty content to be compensated with pizza and a 12-pack of Sam Summer. We all got a little messy and we were all pretty sore by the end of the day, but I sure did enjoy the fruits of our labor:
Wallcolor: Benjamin Moore "Wildflowers"
Desk, bookcase and small chair color: Behr "Powdered Snow"
Swivel chair color: Behr "April Mist"
The swivel chair color was a last minute decision. I'm not sure what made me think of it, but one moment I just knew that chair had to be different. I'm in love with the end result. Wednesday night I slept like a baby. I woke up early on Thursday morning and before heading out to the beach for the holiday, I swung by the store and added some touch-ups to the furniture. If you're planning to paint furniture, particularly cheap, second hand and non-wood furniture, I HIGHLY recommend you use the
Zinsser primer- that stuff rocks. Paint LOVES it. You slap it on real quick, let it dry and then your paint just glides right on and sticks like mad. I've heard horror stories of people painting furniture and the paint just resisting every step of the way. This primer is the bees knees and will save you many sleepless nights and headaches stressing over your botched furniture make-over. Best 18 bucks I spent on this project. No joke.
With the hardest parts out of the way- selling the desk and painting- the office was finally ready to be put together. As they say, the devil's in the details and this was no exception. I chose accessories that not only functioned for the space, but that also worked with the new color scheme. I bought inexpensive cardboard banker's boxes at Office Max and covered them with brown craft paper. I printed out the labels and then laminated them before gluing them to the covered boxes:
For the how-to tutorial, click
here.
Baskets and mini boxes from Dollar Tree hold all sorts of unsightly office items and a few office storage pieces from Target not only function for Juhree's preferred workflow method of "piles of things," but they look pretty, too!
Finally, a splash of coral, some personal touches with lots of photos and a wall of fashion artwork and my design was complete!
The is the wall that used to have the tacky framed bridal advertisements. Much improved, methinks. Your thoughts?
Is that owl amazing or what? I named him Privilege, because that's what it is to live in this office. And yes, that is a photo of me and Juhree riding the Batman roller coaster at Six Flags.
Are you ready to see the finished office? This post is seriously epic, and if you're still reading, you've earned the big reveal:
This photo was taken before the computer and printer were put back in place. My next proposal will be for a MacBook Pro because let's be honest, computer towers and huge monitors are just gross.
Here's the office with all the necessary equipment:
Admittedly, it's still lovely. Just take a moment to let it all sink in and then move on to the other views...
The light beige area rug and the fashion pictures on the far wall were some of my favorite touches because they weren't necessarily the first things I thought of when I planned this renovation, but they really complete the overall look and feel of the space. So, for my first major redecorating project, I think I did a pretty great job. And I was under budget- the ending tally was $434 with about $170 of that going to paint and primer. It took two gallons of paint+primer combo to cover the dark coral walls with the light yellow. TWO, yes TWO professional painters told me not to bother priming the walls. I took their advice. If I were to go back in time and do it all again, I would prime, professional advice be damned.
To view all the inspiration, before and after photos and the how-to tutorials, visit my Pinterest page
Juhree's Office Renovation Project. But before you head over there, drop a comment below and tell me how all my hard work paid off. And as always, thanks for reading!